Install PHP APCu on Plesk
Install APCu extension on the server
Update the PHP versions to the versions that are required by your system. Using a SSH connection, run the following commands:
Using Plesk UI
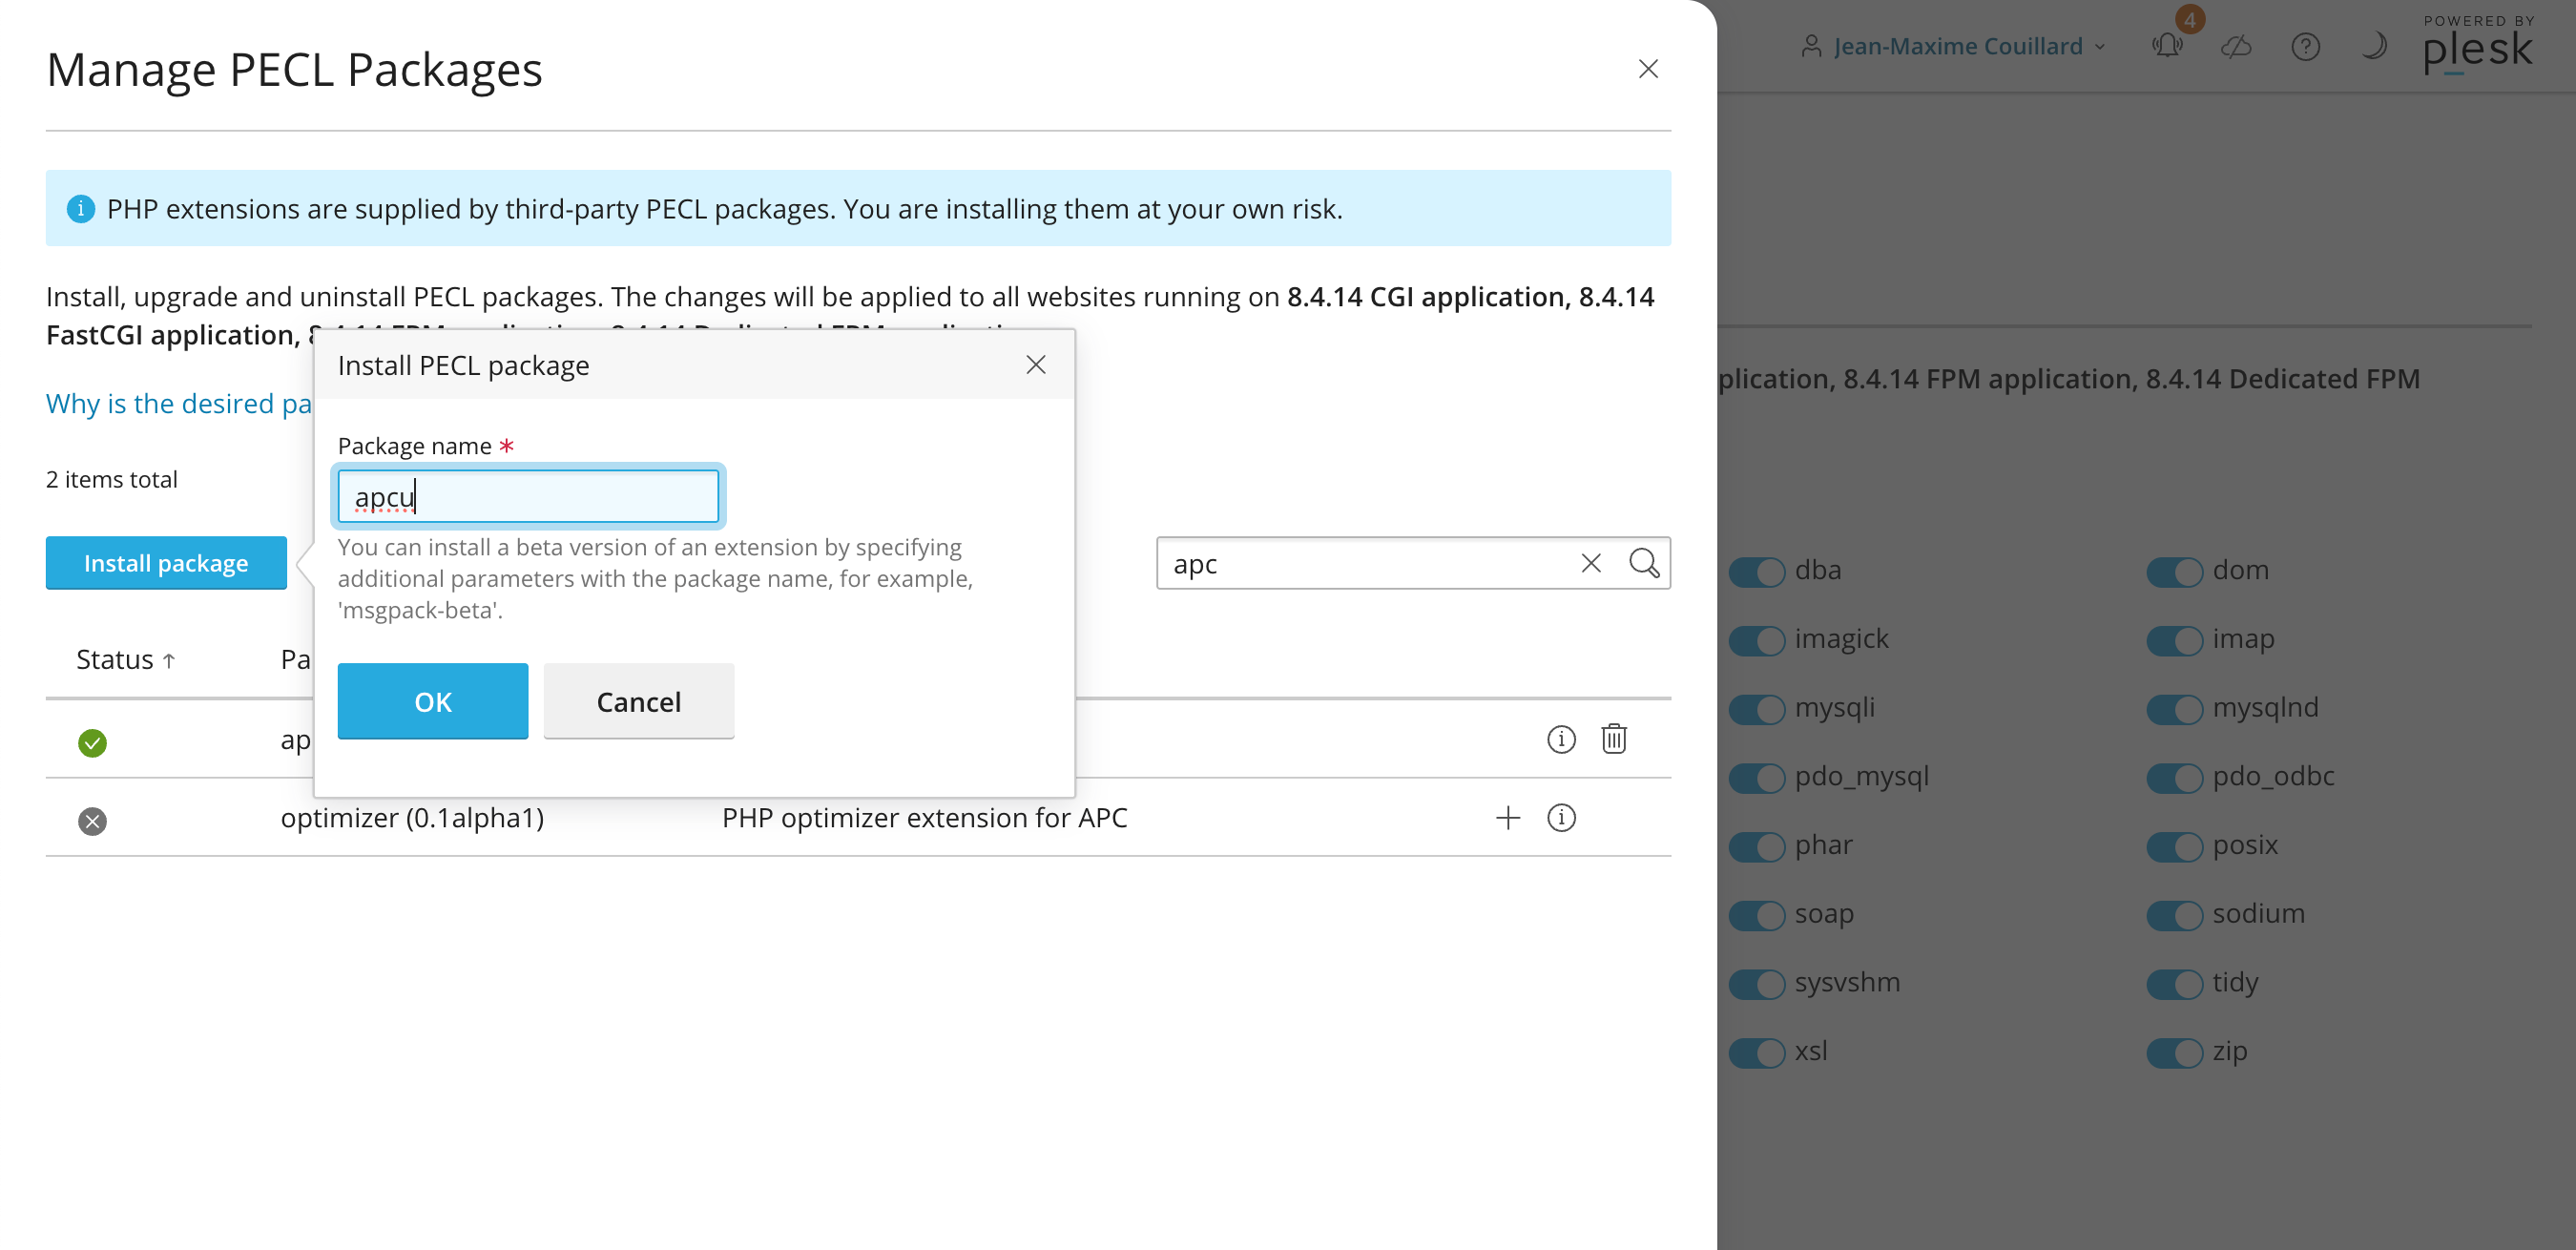
Head to the PHP Settings page and select the PHP version for which you want to install APCu. Then click on Manage PECL Packages and manually install apcu:

Manually, on CentOS/AlmaLinux
yum install plesk-php83-devel plesk-php84-devel zlib-devel gcc
/opt/plesk/php/8.3/bin/pecl install apcu
/opt/plesk/php/8.4/bin/pecl install apcu
Manually, on Ubuntu
apt update
apt install plesk-php83-dev plesk-php84-dev zlib1g-dev gcc make
/opt/plesk/php/8.3/bin/pecl install apcu
/opt/plesk/php/8.4/bin/pecl install apcu
Enable the APCu PHP module
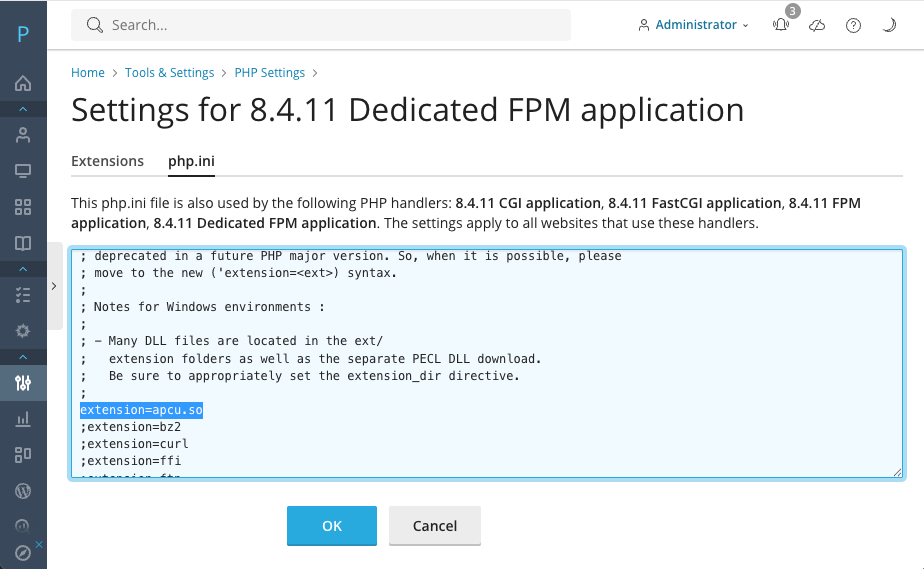
After installation, the new extension must be enabled. This can be done by using the Plesk UI in Tools & Settings > PHP Settings > php.ini

Add (or uncomment) for the following line :
extension=apcu.so
Restart the web server
Then restart the web servers to make sur that the new configurations have been read:
On CentOS/AlmaLinux
service httpd restart
On Ubuntu
service apache2 restart
Setting APCu cache size
Edit the php.ini file to specify the size of the cache (default is 32M). This can be done by using the Plesk UI in Tools & Settings > PHP Settings > php.ini.
apc.shm_size = 512M
Using APCu with Wordpress
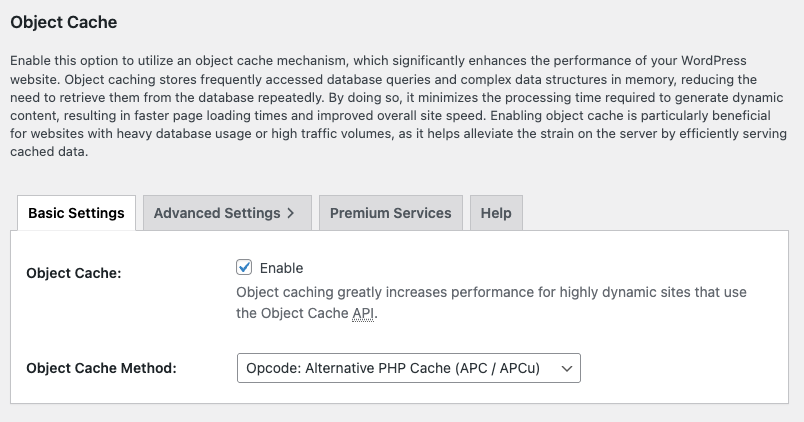
You can use APCu cache in Wordpress to speed up loading time considerably. It will cache Transients in memory (instead of in database), resulting in better loading times. This is possible with W3 Total Cache plugin. Look for the Object Cache settings.

